Introduction
In this step-by-step walkthrough, you'll be shown how to add a document information panel to a Microsoft Word document content type, on SharePoint Server 2007 Enterprise, in order to provide users a convenient method for entering document metadata. The scenario explored here involves building a document library for retaining billing statements. By enabling users to enter this meta data themselves, at the time they are actually working with the document, it reduces their workload in minimizing the number of steps they need to take to enter a documents into document libraries. It reduces the workload of the SharePoint administrator or other assigned person, who otherwise would need to perform this task. This walkthrough proceeds in four steps: 1) build the new document library; 2) build the new content type, 3) add the new content type to the new document library, and 4) test the document panel. Note: you must have InfoPath 2007 or greater installed on your system in order to interact with the document panel. However, you don't need to write a single line of code. Good luck!
Procedure
Step 1: Build the New Document Library
Open a browser and connect to your SharePoint 2007 instance.

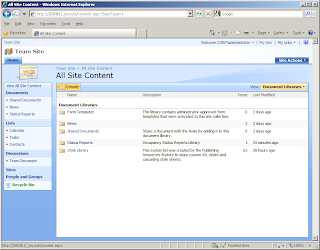
Under View All Site Content, click Documents, and then hover your cursor over the Create button.
Click Create, and then under the Libraries tasks group, hover your cursor over Document Library.

Click Document Library.

Enter Statements for the name, a short description, and then click OK. Note that a new library link now appears under the Document content group, at left.

Click Settings, and then select Document Library Settings.

Scroll down a bit on the Customize Statements page, and then look for the Create column link.

Click this link. This takes you to the Create Column page. You'll revisit this page several times: let's create four new columns (field names and types shown):

Note: I previously created a Customers list based upon the SharePoint Contacts list, and I populated this with a few entries. The Customer ID field that you see in the window capture above is of type Lookup, and it is lookup up the customer ID from a field in the Customers list.
Now navigate back to the Statements document library. You'll see that it now has a number of additional columns displayed.

Let's clean this up a bit. The view that you see here doesn't need to display all of the available fields, just a few. Let's reduce the number of displayed fields. Go back to the Customize Statements page again: go Settings > Document Library Settings, scroll down to the bottom of this page, and then click Create view. The Create View: Statements page appears.

Click Standard View.

Let's call this view Default, just to be consistent with its purpose, since we want it to be the default view. Then scroll down a bit and uncheck the following fields

Step 2: Build the New Content Type
Go back to the site main page, and then, click the Site Actions button, at the right, to reveal its menu.

Select Site Settings (some may note that this site doesn't have the publishing infrastructure enabled yet).

Under the Galleries group of action links, look for the Site content types link. Click this link.

Look for the Create button, just above the list of content types. Click this button.

Enter the following and leave all other fields default:

Click Advanced settings under the Settings group of action links.

Select the option, Upload a new document template. Then navigate to the Microsoft Word document that you want to use. For this walkthrough, I used a billing statement template available through Microsoft Office 2010: Billing Statement, provided by Campbell's Plumbing and Construction.

Leave all other settings at their default, and then click OK.

That's it. You've added a new site content type. This content type will now be available throughout the site.
Step 3: Add the New Content Type to the New Document Library
Navigate back to the Statements document library Customize Statements page: go Statements > Settings > Document Library Settings > Advanced Settings. This takes you to the Document Library Advanced Settings: Statements page.

Select the Yes option under Allow management of content types? setting. Click OK. This will take you back to the Customize Settings: Statements page. Note the new group that now appears on this page: Content Types.

Click that link, Add from existing site content types that you see just below the Content Types section.

From the Select site content types from: drop down list box, select the Statements group. Just one item will be shown for this group. Move this item over into the Content types to add box.

Click OK. This takes you back to the Customize Settings: Statements page. Note that now you see two content types listed under the Content Types group.

When my users navigate to the Statements document library, and the click the New button, I don't want to confuse them with inappropriate choices. I want to make things as clear and direct for my users in order to minimize problems. Right now, when users click the New button, they'll be presented with two choices:

On the List Content Type: Document page, look for the Settings group of action links, and then click the link Delete this content type. This will take you back to the Customize Settings: Statements page. Note that now only one item is listed under the Content Types group.

Now for just a bit of cleanup. On the Customize Settings: Statements page, click the Advanced Settings link. This takes you to the Document Library Advanced Settings: Statements page. Scroll down this page until you see the Folders group. In this group, for the option Display "New Folder" command on the New menu?, select No.

Now click OK. Navigate back to the Statements document library, and then click on the down arrow next to the New button. Note that now only one option is displayed.

That's it. You're done. You've added the new content type to the new document library you created earlier. Now let's test things to make sure they integrate correctly.
Step 4: Test the Document Panel
On the Statements document library page, click the New button.

Click OK. Microsoft Word will launch, displaying the Billing Statement document template, complete with document panel.

Note that the document panel fields are type-sensitive. Thus, for example, a data field will display a popup calendar option. Lookup types will automatically lookup the available field list, at the time that Word launches, and then provide you with a listing of all appropriate choices. For example, the Customer ID lookup pulls customer IDs from the Customers list, at the moment that a user clicks the New button to create a new instance of the document.

Once you've completed entering data into the document panel, and updated the document itself, just click the Save button in Microsoft Word, and your document will automatically be saved to the originating document library, in this case the Statements document library.

This completes this step-by-step walkthrough showing you how to add a document information panel to a SharePoint 2007 content type in order to provide users a convenient method for entering document meta data. Happy computing!
References
In this step-by-step walkthrough, you'll be shown how to add a document information panel to a Microsoft Word document content type, on SharePoint Server 2007 Enterprise, in order to provide users a convenient method for entering document metadata. The scenario explored here involves building a document library for retaining billing statements. By enabling users to enter this meta data themselves, at the time they are actually working with the document, it reduces their workload in minimizing the number of steps they need to take to enter a documents into document libraries. It reduces the workload of the SharePoint administrator or other assigned person, who otherwise would need to perform this task. This walkthrough proceeds in four steps: 1) build the new document library; 2) build the new content type, 3) add the new content type to the new document library, and 4) test the document panel. Note: you must have InfoPath 2007 or greater installed on your system in order to interact with the document panel. However, you don't need to write a single line of code. Good luck!
Procedure
Step 1: Build the New Document Library
Open a browser and connect to your SharePoint 2007 instance.

Under View All Site Content, click Documents, and then hover your cursor over the Create button.
Click Create, and then under the Libraries tasks group, hover your cursor over Document Library.

Click Document Library.

Enter Statements for the name, a short description, and then click OK. Note that a new library link now appears under the Document content group, at left.

Click Settings, and then select Document Library Settings.

Scroll down a bit on the Customize Statements page, and then look for the Create column link.

Click this link. This takes you to the Create Column page. You'll revisit this page several times: let's create four new columns (field names and types shown):
- Customer ID | Single Line of text
- Statement ID | Number
- Statement Date | Date Only
- Amount | Currency

Note: I previously created a Customers list based upon the SharePoint Contacts list, and I populated this with a few entries. The Customer ID field that you see in the window capture above is of type Lookup, and it is lookup up the customer ID from a field in the Customers list.
Now navigate back to the Statements document library. You'll see that it now has a number of additional columns displayed.

Let's clean this up a bit. The view that you see here doesn't need to display all of the available fields, just a few. Let's reduce the number of displayed fields. Go back to the Customize Statements page again: go Settings > Document Library Settings, scroll down to the bottom of this page, and then click Create view. The Create View: Statements page appears.

Click Standard View.

Let's call this view Default, just to be consistent with its purpose, since we want it to be the default view. Then scroll down a bit and uncheck the following fields
- Type
- Modified
- Modified By

Step 2: Build the New Content Type
Go back to the site main page, and then, click the Site Actions button, at the right, to reveal its menu.

Select Site Settings (some may note that this site doesn't have the publishing infrastructure enabled yet).

Under the Galleries group of action links, look for the Site content types link. Click this link.

Look for the Create button, just above the list of content types. Click this button.

Enter the following and leave all other fields default:
- Name: Statements
- Description: billing statement document template
- New Group: Statements

Click Advanced settings under the Settings group of action links.

Select the option, Upload a new document template. Then navigate to the Microsoft Word document that you want to use. For this walkthrough, I used a billing statement template available through Microsoft Office 2010: Billing Statement, provided by Campbell's Plumbing and Construction.

Leave all other settings at their default, and then click OK.

That's it. You've added a new site content type. This content type will now be available throughout the site.
Step 3: Add the New Content Type to the New Document Library
Navigate back to the Statements document library Customize Statements page: go Statements > Settings > Document Library Settings > Advanced Settings. This takes you to the Document Library Advanced Settings: Statements page.

Select the Yes option under Allow management of content types? setting. Click OK. This will take you back to the Customize Settings: Statements page. Note the new group that now appears on this page: Content Types.

Click that link, Add from existing site content types that you see just below the Content Types section.

From the Select site content types from: drop down list box, select the Statements group. Just one item will be shown for this group. Move this item over into the Content types to add box.

Click OK. This takes you back to the Customize Settings: Statements page. Note that now you see two content types listed under the Content Types group.

When my users navigate to the Statements document library, and the click the New button, I don't want to confuse them with inappropriate choices. I want to make things as clear and direct for my users in order to minimize problems. Right now, when users click the New button, they'll be presented with two choices:
- Document
- Statements

On the List Content Type: Document page, look for the Settings group of action links, and then click the link Delete this content type. This will take you back to the Customize Settings: Statements page. Note that now only one item is listed under the Content Types group.

Now for just a bit of cleanup. On the Customize Settings: Statements page, click the Advanced Settings link. This takes you to the Document Library Advanced Settings: Statements page. Scroll down this page until you see the Folders group. In this group, for the option Display "New Folder" command on the New menu?, select No.

Now click OK. Navigate back to the Statements document library, and then click on the down arrow next to the New button. Note that now only one option is displayed.

That's it. You're done. You've added the new content type to the new document library you created earlier. Now let's test things to make sure they integrate correctly.
Step 4: Test the Document Panel
On the Statements document library page, click the New button.

Click OK. Microsoft Word will launch, displaying the Billing Statement document template, complete with document panel.

Note that the document panel fields are type-sensitive. Thus, for example, a data field will display a popup calendar option. Lookup types will automatically lookup the available field list, at the time that Word launches, and then provide you with a listing of all appropriate choices. For example, the Customer ID lookup pulls customer IDs from the Customers list, at the moment that a user clicks the New button to create a new instance of the document.

Once you've completed entering data into the document panel, and updated the document itself, just click the Save button in Microsoft Word, and your document will automatically be saved to the originating document library, in this case the Statements document library.

This completes this step-by-step walkthrough showing you how to add a document information panel to a SharePoint 2007 content type in order to provide users a convenient method for entering document meta data. Happy computing!
References
- Microsoft Office SharePoint Server 2007: Create a site content type
- MSDN: Office 2007: Document Information Panel Overview
- MSDN Magazine: Designing Form Templates With The New Features Of InfoPath
- Jan Tielens' Bloggings: YASR: SharePoint 2007 Site Columns
- SharePoint Administration & Development + InfoPath: InfoPath SharePoint: Submit InfoPath form to SharePoint List or Library using Content Type
- You could add meta data fields to this site content type at the time that you created it, and these meta data fields would be introduced into each document library that you added this document to.
- You must have InfoPath 2007 or greater installed on your system in order to interact with the document panel.
- If you want to edit the document panel, such as for example adding company logo, other graphics, or change the panel UI in other ways, you will need to use InfoPath to do this.
No comments:
Post a Comment