Introduction
This procedure walks you through step-by-step initial configuration of SharePoint Server 2007 Enterprise hosted on Windows Server 2003 Enterprise Edition SP2 in a small farm configuration, after the completion of SharePoint 2007 installation. For this procedure the small famr configuration consists of a single SharePoint 2007 server and a single Microsoft SQL Server 2005 Express backend. This procedure picks up where Installing SharePoint 2007 on Windows Server 2003 Step-by-Step left off. Initial configuration activities can be grouped into four phases: 1) Starting core services, 2) creating core web applications, 3) configuring and starting shared services, and 4) creating the first site collection. In SharePoint terminology a "site collection" is what is referred to in common terms as a "website." Good Luck!
Procedure
Phase 1: Starting Core Services
Once installation is completed, the Central Administration page will be launched.

Note the warning message in red. This warning message will eventually go away once step 3 is completed. Let's first take a look at the Administrator Tasks list. Click on Initial Deployment: Add servers to farm.

For this small farm configuration, there is nothing more to add, so let's mark this task completed. Click on Edit Item, and then scoll down until you see the Status item.

Change the status to Completed, and then click OK. This is the process for changing task status. Now return to the Administrator Task list, and then click on Initial Deployment: Add services to server.

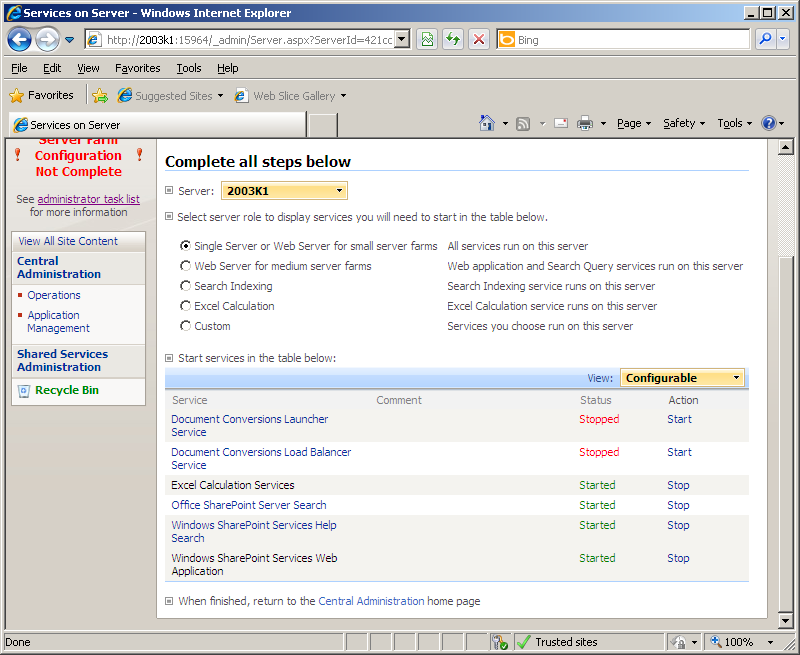
Click the Action link that states the name of the task, Initial deployment: Assign services to servers, and then scroll down until you can see all of the services.

Over the next few steps, most of these services will be started (except for the document conversion ones). Among the radio buttons that are visible, select the option Single Server or Web Server for small server farms All services run on this server. Next, look down the Services list until you find Windows SharePoint Services Help Search: click the Start link to the right of this.

This enables you to set the account that this service will run under. For the purposes of this procedure, both the Windows SharePoint Services Search Service and its Content Access service will run under the same account, namely, corp\spservice.

Once you have entered the account details, click OK. It will take a few moments to implement the configuration.
After it is completed, you will be navigated back to the Services on Server page. Note that now the Windows SharePoint Services Help Search item shows that it has started.

The next service to configure and start is the Office SharePoint Server Search. Look down the list of services until you find this item. Then click its associated Start link.

Check both the Use this server for indexing content and the Use this server for serving search queries options. Enter any email address at this point, as it is unimportant and can be reconfigured later. Now scroll down a bit until you see the Farm Search Service Account item. For the purposes of this procedure, the same domain account will be used: corp\spservice. Note that these accounts can be changed later.

Click OK. You'll be returned to the Services on Server page. Note that now the Office SharePoint Server Search item indicates that it has started.

Next, look down the list until you find the Excel Calculation Services item. Click its Start link. This doesn't require any configuration at this point, so, you'll be returned quickly to the Services on Server page after a few moments. Note that now it indicates that it has started.

This completes startup of the core services running on the SharePoint application server. The next task is to start the SharePoint shared services. But before this is done, it will be helpful later to create a few web applications first, as these will be needed when it comes time to actually configure and start the shared services.
Phase 2: Creating Core Web Applications
Select the Central Administration Home tab.

On the tab section, near the top, select the Application Management tab. You'll see lots of links on this page.

The links are grouped by task area. Look for the SharePoint Web Application Management task group, and then click Create or extend Web Application.

Next, click the link, Create a new Web Application. On the Create a new Web Applications page, leave the port, 80, as is along with the other defaults. Then scroll down a bit until you find the account configuration fields.

For this procedure, the same domain account will be used: corp\spservice. Click OK. It will take a few minutes to create the web application.

After the web application has been created, you will see the Application Created page.

Two more such webs must be created. Repeat the above steps until you have three web applications created. Once you're done, go back to the main Application Management tab.
In the SharePoint Web Application Managment group of links, click the link, Web Application List.

All of the web applications you have created, in addition to the Central Administration web application, will be listed. Now you are ready to configure and start SharePoint shared services.
Phase 3: Configuring and Starting Shared Services
Select the Home tab.
In the Administrator Tasks list, click the link, Configure server farm's shared services.

Next, click the Action link, Configure server farm's shared services.

Note that the name of one of the web applications created previously appears in the Web application drop down box. If you had not created those web applications, you would have had to create them now, by clicking the Create a new Web application link. The web application selection for the Shared Service Provider (SSP) works just fine. Now, scroll down a bit until you see the My Site Location group.

You will likely see the same web application selected for My Site as was selected for you for SSP. This won't work. From the Web application drop down list for My Site, select a different web application - don't select the SharePoint 80 web application, as this will be needed later. Select the other one. Scroll down a bit farther until you find the user account details needed for the SSP web services.

For this procedure, I will continue to use the same domain account: corp\spservice. Leave all other settings at their default, and then click OK. It will take a few moments to configure shared services.

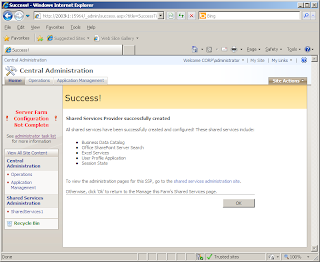
Once it completes, the Success! page is displayed.
Now let's finish configuring shared services. Select the Home tab. Note that the red warning message has disappeared.

On the left navigation bar, under Shared Services Administration, click SharedServices1.

Next, click for the Search group of links, and then click Search settings.

On the list of links below, click Content sources and crawl schedules.

On the list of content sources, click Local Office SharePoint Server sites.

In the Start Addresses box, you'll see listed the familiar URLs to all of the web applications that you have created to date. Scroll a bit down.
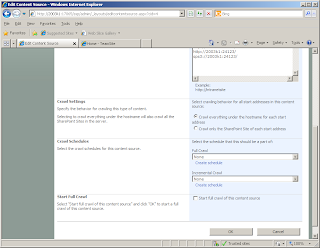
Let's create a crawl schedule. Click the link, Crawl schedule.
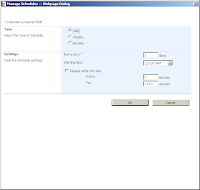
For this procedure, I set a weekly full crawl schedule. Now set an incremental crawl schedule.

And then select the option to initiate a full crawl.

The full crawl occurs after clicking OK.

When the crawl is completed, it's status will change.

To check the results of the crawl, click SharedServeices1.
Click Search settings.
And then click Crawl logs, below.

Tip: if only one item should be listed for one of the web application crawl results, and when you click that item, you see the following:
This completes configuration and startup of SharePoint shared services. Now at last to create a "site collection," or website.
Phase 4: Creating the first Site Collection
Click Back to Central Administration.
Select the Application Management tab.

Under the SharePoint Site Management group of links, click Create site collection.

Check the Web Application drop down list. Make sure that the web Application displayed is not one previously used for SSP or My Sites. Otherwise, select one that hasn't been used before. Then enter a name for the collection (website). For this procedure, I entered TeamSite. Leave other parameters at their default. Then scroll down.

For the Primary Site Collection Administrator user , select a user account, and then click OK.

After a few moments, your site will be created.

Copy and past the displayed URL into a new browser or tab instance.

Congratulations! You're done.
References
Notes
This procedure walks you through step-by-step initial configuration of SharePoint Server 2007 Enterprise hosted on Windows Server 2003 Enterprise Edition SP2 in a small farm configuration, after the completion of SharePoint 2007 installation. For this procedure the small famr configuration consists of a single SharePoint 2007 server and a single Microsoft SQL Server 2005 Express backend. This procedure picks up where Installing SharePoint 2007 on Windows Server 2003 Step-by-Step left off. Initial configuration activities can be grouped into four phases: 1) Starting core services, 2) creating core web applications, 3) configuring and starting shared services, and 4) creating the first site collection. In SharePoint terminology a "site collection" is what is referred to in common terms as a "website." Good Luck!
Procedure
Phase 1: Starting Core Services
Once installation is completed, the Central Administration page will be launched.

Note the warning message in red. This warning message will eventually go away once step 3 is completed. Let's first take a look at the Administrator Tasks list. Click on Initial Deployment: Add servers to farm.

For this small farm configuration, there is nothing more to add, so let's mark this task completed. Click on Edit Item, and then scoll down until you see the Status item.

Change the status to Completed, and then click OK. This is the process for changing task status. Now return to the Administrator Task list, and then click on Initial Deployment: Add services to server.

Click the Action link that states the name of the task, Initial deployment: Assign services to servers, and then scroll down until you can see all of the services.

Over the next few steps, most of these services will be started (except for the document conversion ones). Among the radio buttons that are visible, select the option Single Server or Web Server for small server farms All services run on this server. Next, look down the Services list until you find Windows SharePoint Services Help Search: click the Start link to the right of this.

This enables you to set the account that this service will run under. For the purposes of this procedure, both the Windows SharePoint Services Search Service and its Content Access service will run under the same account, namely, corp\spservice.

Once you have entered the account details, click OK. It will take a few moments to implement the configuration.
After it is completed, you will be navigated back to the Services on Server page. Note that now the Windows SharePoint Services Help Search item shows that it has started.

The next service to configure and start is the Office SharePoint Server Search. Look down the list of services until you find this item. Then click its associated Start link.

Check both the Use this server for indexing content and the Use this server for serving search queries options. Enter any email address at this point, as it is unimportant and can be reconfigured later. Now scroll down a bit until you see the Farm Search Service Account item. For the purposes of this procedure, the same domain account will be used: corp\spservice. Note that these accounts can be changed later.

Click OK. You'll be returned to the Services on Server page. Note that now the Office SharePoint Server Search item indicates that it has started.

Next, look down the list until you find the Excel Calculation Services item. Click its Start link. This doesn't require any configuration at this point, so, you'll be returned quickly to the Services on Server page after a few moments. Note that now it indicates that it has started.
This completes startup of the core services running on the SharePoint application server. The next task is to start the SharePoint shared services. But before this is done, it will be helpful later to create a few web applications first, as these will be needed when it comes time to actually configure and start the shared services.
Phase 2: Creating Core Web Applications
Select the Central Administration Home tab.

On the tab section, near the top, select the Application Management tab. You'll see lots of links on this page.

The links are grouped by task area. Look for the SharePoint Web Application Management task group, and then click Create or extend Web Application.

Next, click the link, Create a new Web Application. On the Create a new Web Applications page, leave the port, 80, as is along with the other defaults. Then scroll down a bit until you find the account configuration fields.

For this procedure, the same domain account will be used: corp\spservice. Click OK. It will take a few minutes to create the web application.

After the web application has been created, you will see the Application Created page.

Two more such webs must be created. Repeat the above steps until you have three web applications created. Once you're done, go back to the main Application Management tab.
In the SharePoint Web Application Managment group of links, click the link, Web Application List.

All of the web applications you have created, in addition to the Central Administration web application, will be listed. Now you are ready to configure and start SharePoint shared services.
Phase 3: Configuring and Starting Shared Services
Select the Home tab.
In the Administrator Tasks list, click the link, Configure server farm's shared services.

Next, click the Action link, Configure server farm's shared services.

Note that the name of one of the web applications created previously appears in the Web application drop down box. If you had not created those web applications, you would have had to create them now, by clicking the Create a new Web application link. The web application selection for the Shared Service Provider (SSP) works just fine. Now, scroll down a bit until you see the My Site Location group.

You will likely see the same web application selected for My Site as was selected for you for SSP. This won't work. From the Web application drop down list for My Site, select a different web application - don't select the SharePoint 80 web application, as this will be needed later. Select the other one. Scroll down a bit farther until you find the user account details needed for the SSP web services.

For this procedure, I will continue to use the same domain account: corp\spservice. Leave all other settings at their default, and then click OK. It will take a few moments to configure shared services.

Once it completes, the Success! page is displayed.
Now let's finish configuring shared services. Select the Home tab. Note that the red warning message has disappeared.

On the left navigation bar, under Shared Services Administration, click SharedServices1.

Next, click for the Search group of links, and then click Search settings.

On the list of links below, click Content sources and crawl schedules.

On the list of content sources, click Local Office SharePoint Server sites.

In the Start Addresses box, you'll see listed the familiar URLs to all of the web applications that you have created to date. Scroll a bit down.
Let's create a crawl schedule. Click the link, Crawl schedule.
For this procedure, I set a weekly full crawl schedule. Now set an incremental crawl schedule.

And then select the option to initiate a full crawl.

The full crawl occurs after clicking OK.

When the crawl is completed, it's status will change.

To check the results of the crawl, click SharedServeices1.
Click Search settings.
And then click Crawl logs, below.

Tip: if only one item should be listed for one of the web application crawl results, and when you click that item, you see the following:
Element not found. (Exception from HRESULT: 0x8002802B (TYPE_E_ELEMENTNOTFOUND)) (ComInterop Exception)try the solution discussed in the References section.
This completes configuration and startup of SharePoint shared services. Now at last to create a "site collection," or website.
Phase 4: Creating the first Site Collection
Click Back to Central Administration.
Select the Application Management tab.

Under the SharePoint Site Management group of links, click Create site collection.

Check the Web Application drop down list. Make sure that the web Application displayed is not one previously used for SSP or My Sites. Otherwise, select one that hasn't been used before. Then enter a name for the collection (website). For this procedure, I entered TeamSite. Leave other parameters at their default. Then scroll down.

For the Primary Site Collection Administrator user , select a user account, and then click OK.

After a few moments, your site will be created.

Copy and past the displayed URL into a new browser or tab instance.

Congratulations! You're done.
References
Notes
- None
No comments:
Post a Comment